Самое актуальное и обсуждаемое

Актуальное
Важно знать!
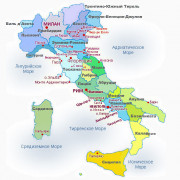
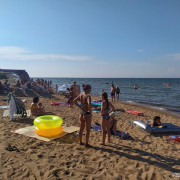
10 лучших пляжных курортов италии
ПЛЯЖНЫЕ КУРОРТЫ ИТАЛИИ:
АДРИАТИКА или РИВЬЕРА ВЕНЕЦИИ,
СИЦИЛИЯ или САРДИНИЯ,
ТОСКАНА или ЛИГУРИЯ,
ПОБЕРЕЖЬЕ ОДИССЕЯ или ОСТРОВ ИСКЬЯ
КАЛАБРИЯ или АПУЛИЯ
На витрине туров указаны минимальные...
Читать далее
18 интересных достопримечательностей тегерана
35 достопримечательностей казани
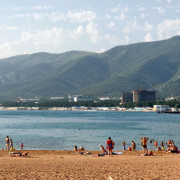
16 лучших отелей сочи
9 забавных фактов о чехах
30 лучших развлечений в москве для детей
41 достопримечательность крита, которую стоит посетить
13 лучших ресторанов москвы с панорамным видом
10 лучших семейных кафе москвы с детскими игровыми комнатами и анимацией
30 крупнейших городов ирландии
Популярное
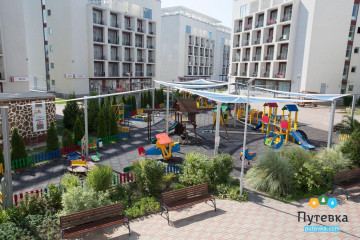
10 лучших отелей адлера для отдыха с детьми в 2021 году
Апарт-отель Имеретинский — Прибрежный квартал
Улица Голубая 1 Ж, Адлер, Россия
Апарт-отель расположен...
57
0
0
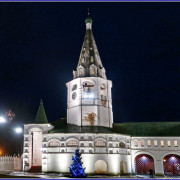
35 достопримечательностей владимира, которые стоит посмотреть
Гиды во Владимире
Все гиды во Владимире
Экскурсии Марины Александровны Евсюковой
В...
52
0
0

10 лучших отелей гагры
5 звезд
Wellness Park Hotel Gagra All-Inclusive
Лучший выбор для семейного отдыха (если средства позволяют...
53
0
0
20 лучших экскурсий в санкт-петербурге для детей
Квест «Дойти до Берлина» в Военно-медицинском музее для детей (от 10 до 13 лет)
Продолжительность 4...
88
0
0
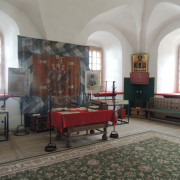
5 самых интересных музеев о великой отечественной войне в беларуси
Линия Сталина
Историко-культурный комплекс «Линия Сталина» вошел в наш рейтинг из-за своей масштабности...
51
0
0
50 достопримечательностей нижнего новгорода. что посмотреть в 2021 году
Туры по Нижнему Новгороду на 3 дня
Чтобы не переживать, успеете ли вы посетить все самые колоритные...
55
0
0
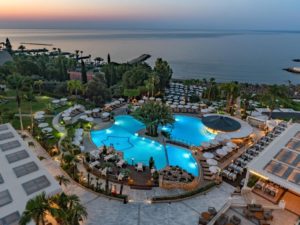
15 лучших отелей на кипре 4 звезды все включено на первой линии
Venus Beach Hotel
Tombs Of The Kings Avenue, 8063 Пафос, Кипр
Отель находится рядом с археологическим...
46
0
0
10 бюджетных развлечений в москве
Невидимые чернила
artofmanliness.com
Магию мира секретных агентов и отважных пиратов оценит любой ребенок....
48
0
0
Полезные советы
Важно знать!
50 фактов об италии
Итальянские специи — Традиционные пряности
«Но специи — моя страсть…
Я знаю о них все — их происхождение, значение их цветов, запахи. Я могу назвать каждую истинным именем, которое было дано ей в самом...
Читать далее
10 лучших горячих источников тюмени
15 дворцов беларуси, которые стоит увидеть
10 лучших отелей анапы с теплым бассейном
12 лучших университетов мира
11 самых чистых пляжей анапы и ее окрестностей
5 хороших мест для отдыха на чёрном море
31 направление для идеального пляжного отдыха зимой
14 лучших курортов таиланда
10 лучших музеев тулы
Рекомендуем


Лучшее

Важно знать!
10 малочисленных коренных народов россии
Вечное сияние чистого разума
https://www.youtube.com/embed/hTIrC9875u8
Жанр: мелодрама, фантастика, драмаСтрана: СШАВ ролях: Джим Керри, Кейт Уинслет, Джерри Роберт Бирн, Элайджа Вуд, Томас Джей РайанРежиссёр:...
Читать далее
22 знаменитые достопримечательности крошечного и великого ватикана
20 достопримечательностей гибралтара, которые стоит посетить
6 причин, по которым россияне, переехавшие в черногорию, жалеют о своем решении
7 самых инстаграмных мест, куда можно дешево съездить на уикенд из москвы
13 лучших пляжей майами
50 прибыльных бизнес-идей с минимальными вложениями в 2021 году
12 способов ориентирования на местности
20 лучших экскурсий в пригороды санкт-петербурга
20 отелей стамбула с видом на босфор
Новое


Обсуждаемое
Важно знать!
24 достопримечательности пскова, которые стоит посмотреть
Музеи
Маршрут по Пскову за 1 день может также включать посещение нескольких музеев. В них вы узнаете подробнее о разных вехах истории древнего города и судьбах именитых личностей, связанных с ним.
Псковский...
Читать далее
30 солнечных достопримечательностей майами
33 главные достопримечательности парижа
10 самых длинных и больших рек россии
10 фактов, которые вы не знали о гренландии
12 самых красивых городов греции
7 лучших курортов греции
46 лучших достопримечательностей сочи
2 класс. окружающий мир. государственная символика россии
10 лучших островов таиланда для пляжного отдыха
Обновления
 Азия
Остров Рок: Экзотика и Роскошь Таиланда для незабываемого тура!
Азия
Остров Рок: Экзотика и Роскошь Таиланда для незабываемого тура!
Тайланд, страна восточной экзотики, манит туристов своими бескрайними рисовыми полями, древними храмами,...
 Полезное Туристу
Лучшие горящие туры для пар: выберите романтику и приключения!
Полезное Туристу
Лучшие горящие туры для пар: выберите романтику и приключения!
Горящие туры: Как выбрать идеальное путешествие для влюбленных
Какие самые популярные горящие туры...
 Азия
Борнео — лучшие места для посещения!
Азия
Борнео — лучшие места для посещения!
Борнео - это третий по величине остров в мире и расположен в Юго-Восточной Азии, поделенный между Индонезией,...
Как выглядит осина дерево фото летом
Заготовка целебного сырья
Измельченная кора осины, уже готовая к изготовлению препаратов, продается...
Сфагнум
Как вырастить мох на участке
Различные моховидные часто высаживают на приусадебных территориях, где...
Чем полезна груша
Высокорослая, среднерослая, низкорослая, карликовая груша – сорта, описание и фото
По высоте штамба...
Кудрявая петрушка (17 фото): почему запрещена кучерявая зелень и чем вредна для организма, выращивание сортов «мооскраузе 2» и «кучерявец» из семян
Правила выращивания и ухода
Пряная огородная трава любит тепло и солнечный свет, хорошо растет в легкой...
Астильба с белыми цветами: сорта с фото
Астильба: кратко о цветке
Куст имеет длинные узкие листья на высоких стеблях с зеленым или красновато-зеленным...
Насекомое комар: описание и виды
Интересные факты из жизни Дмитрия Комарова
С детства Дмитрий мечтал работать в социальной сфере и много...
Формирование огурцов в дачной теплице
Как правильно формировать огурцы
Формирование огуречных культур должно осуществляться не только своевременно,...
Описание сортов лука шалот, выращивание и уход, когда убирать
Уход за луком-шалотом
Вырастить лук-шалот на своем участке очень просто. Для этого его надо своевременно...
Как вырастить дельфиниум: секреты садоводов
Дельфиниум «Боллклейд» (Delphinium `Ballkleid`)
Среднерослый и удивительно стойкий сорт с классической...
Популярное
Нашли ошибку, неточность или опечатку в тексте?
Выделите её и нажмите Ctrl + Enter
Выделите её и нажмите Ctrl + Enter